Extended Depth-Of-Field Using Panorama Tools

Latest Update

Focus stacking software continues to improve and proliferate.

At present, my personal favorite is a new program, Zerene Stacker 1.0.  It offers uniquely good automatic handling of tough "extreme macro" problems, such as bristles and low contrast subjects shot in deep stacks.  At the same time, it's easy to use, its retouching capabilities are first-rate, and it works just fine on simpler problems too.  That's why my links page describes it as "better images, less work". 

Check it out!

Rik Littlefield
November 25, 2009

Great News!

As of this writing [now over 4 years ago], recent updates to two easily used software packages make most of this page "overcome by events".  That is a Good Thing!

Be sure to check them out:  Helicon Focus 3.00 and CombineZ5.  See also John Hollenberg's review of these packages.

The discussion below includes some work using earlier versions of these packages.  The new versions are much improved.  For most subjects, both packages can now produce better results with a lot less work than using Panorama Tools.  Most readers should think of this page as providing historical perspective and possibly some interesting test cases and discussion.

Rik Littlefield
March 13, 2005


Teaser

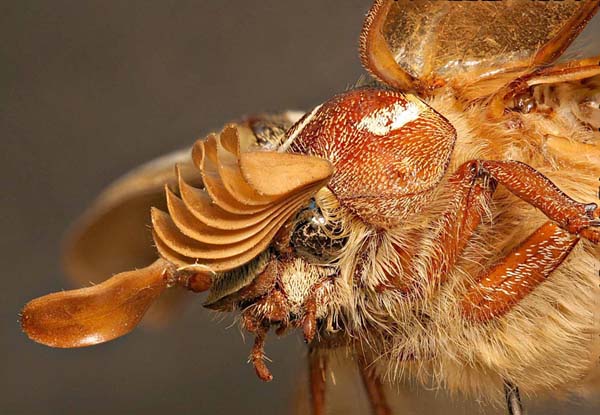
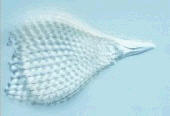
This extended-depth-of-field image was assembled from 55 separate source images, using modified open-source Panorama Tools software and techniques as described below.  (Click on the image for a higher resolution version in a new window.)

Extended depth-of-field image of Ten-Lined June Beetle
This apparently fearsome beast is just a common Ten-Lined June Beetle.  You can search Google for pictures and stories about the insect.

Summary

An extended-depth-of-field capability has been incorporated into recent versions of the open-source Panorama Tools library "pano12.dll".  This capability works much like commercially available extended depth-of-field software. It automatically determines, for every point in the picture, which of numerous overlapping images is focused the best.  Then it generates masks that select only the best focused image areas to be visible in the final picture.

The images produced by this pano12.dll are similar to those produced by other extended-depth-of-field software, but can be easier to edit because the visibility masks can be preserved in the output. 

In addition, Panorama Tools and related software are extremely good at adjusting individual input images' scale and position so that the finest details are properly aligned across the whole sequence of input images.   This alignment contributes a great deal to the high quality assembly illustrated above.

Downloads

The extended-depth-of-field capability described here is now standard with pano12.dll versions 2.7.0.5 and above.  Useful downloads are:
Members of  the Yahoo PanoTools group should check that group's Files area at http://groups.yahoo.com/group/PanoTools/files/PanoTools/ for updated binaries.

Instructions

Note: the extended depth-of-field capability contains known problems as documented below.  Please read those before using.

To invoke extended depth-of-field, just add a "z" control line to the PTStitcher script, using your favorite GUI's "show/edit script" button.  For example:

# script file for ptStitcher created by ptGui
p w825 h558 f0 v50 u2 n"PSD_mask"
<more lines not shown>
z m2 f4 s4

Parameters on the "z" line are:

mN  mask type
       m0  hard-edged masks, mutually exclusive
       m1  hard-edged masks, stack of nested masks
       m2  blended masks, stack of nested masks
(m2 is default & strongly recommended -- this option includes a smoothing computation that seems to help a lot.)

fN  focus estimation window size, N = halfwidth of window.
    Recommended value is 0.5% of image width, e.g. 4 pixels for an 800-pixel image.
    Computation cost for focus estimation increases proportional to N^2.  Default f4.
   
sN  smoothing window size, N = halfwidth of window.
    Recommended value is 0.5% of image width, e.g. 4 pixels for an 800-pixel image.
    Computation cost for smoothing increases proportional to N^2.  Default s4.
Extended depth-of-field is computed whenever feathering is selected and the "z" line is present. 

The computed masks are present in "Photoshop with feather" (PSD_mask) and "Multi-image feathered TIFF" (TIFF_mask) outputs.  The effects of the masks are shown in all single-image output, such as TIFF and JPEG.   In PTGui, the results are visible in a Preview image, but not in the Panorama Editor window.

How it Works

This code uses the classical variance method of estimating focus.  An array of "best source" image numbers is computed, recording at each pixel position the PTStitcher image number that has the largest variance of pixel values within a focus-estimation window.  Then masks are computed as follows.  For mask type m0, at each pixel, the mask value is 255 for the best image and 0 for all others.  For mask type m1, at each pixel, the mask value is 255 for the best image and all lower-numbered images, and 0 for all higher-numbered images.  For mask type m2, the array of "best source" image numbers is smoothed by a simple averaging filter.  Then at each pixel position, the mask value is computed as 255 if the image number is less than or equal to the average, 0 if the image number is greater than the average+1, and linearly interpolated between 255 and 0 as the image number is between average and average+1.  I make no claim that this is a particularly good way to do the job, but it was quick to get working and generates perhaps surprisingly good results.

Expected Results -- Example #1

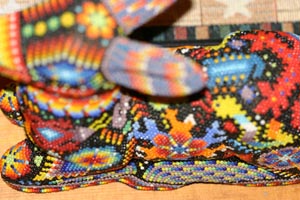
To illustrate the extended depth-of-field feature, I will use the images discussed in Max Lyons' forum at http://www.tawbaware.com/forum2/viewtopic.php?t=759 , aligned and registered as discussed there by JohnH.  Very briefly, these are a set of 8 images that sweep focus from top to bottom of a small beaded deer art object.  The top and bottom focus images are these:
beaded deer, top focus beaded deer, bottom focus
file001.jpg
file008.jpg


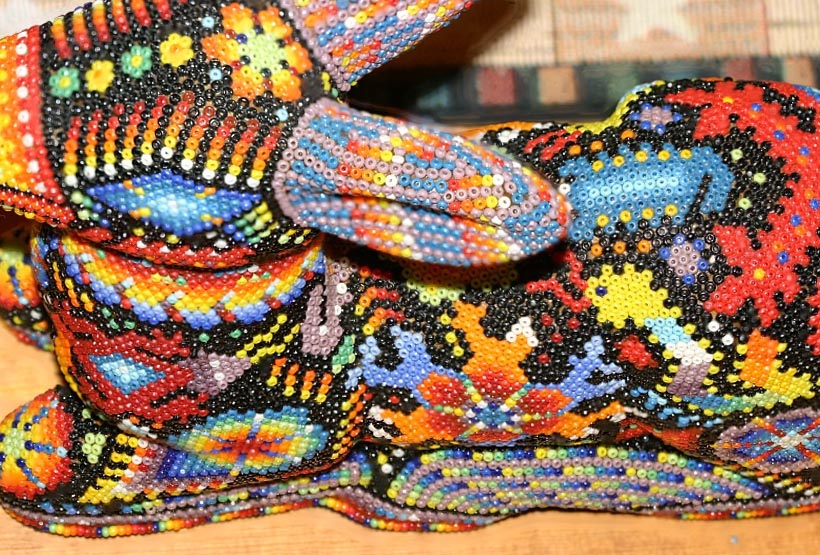
With default parameters (z m2 f4 s4), the computed image is this (displayed at 50%, click to expand):

Extended depth-of-field beaded deer

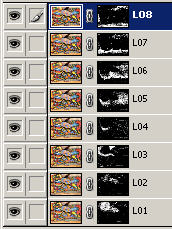
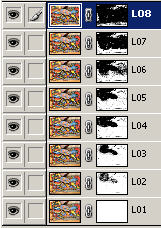
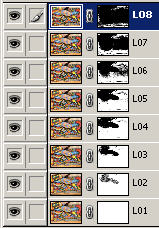
The masks, as shown in the Photoshop Layers palette, look like this:

Photoshop masks for mode m0 Photoshop masks for mode m1 Photoshop masks for mode m2
m0 (hard masks, exclusive)
m1 (hard masks, nested stack)
m2 (blended masks, nested stack)

Another Example

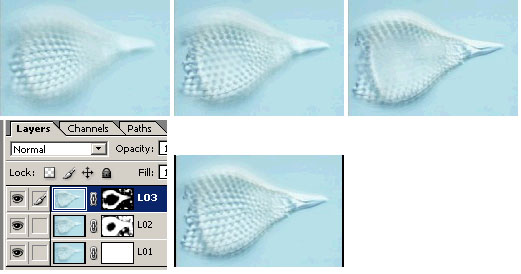
Here are three microscopy images, the computed masks, and the composite image, created with default parameters.  The source images were downloaded from http://bigwww.epfl.ch/demo/edf/ .


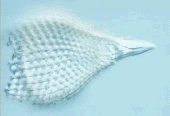
For comparison, the following results are computed without masks, using an algorithm based on complex wavelets, as described at http://bigwww.epfl.ch/demo/edf/ and http://user.cs.tu-berlin.de/~nowozin/waveblend/ respectively.


A More Challenging Example

The preceding two examples seem to be relatively "easy", in the sense that all software tested so far on them does pretty well.

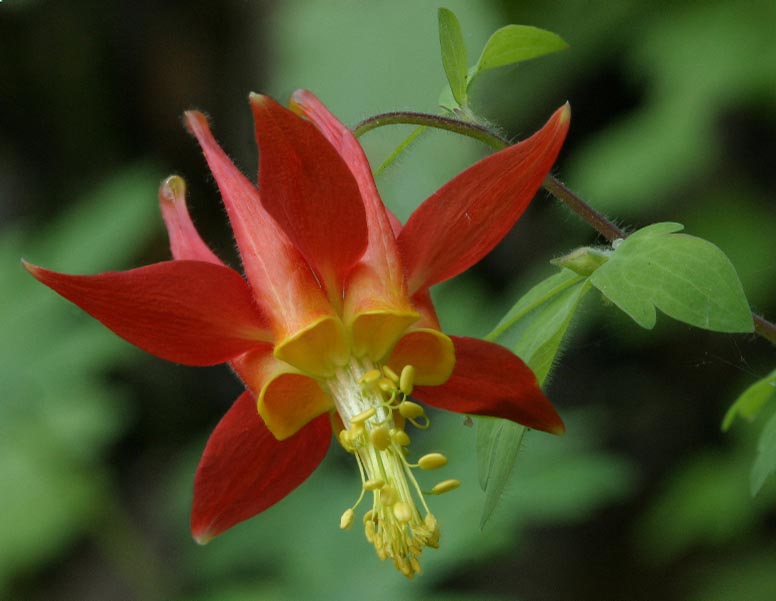
A more challenging example is presented by the lovely Columbine flower photographed by Karl Gohl.  Karl's original montage, viewable at http://www.pbase.com/image/28622076/large, was generated entirely by manual editing of masks in a Photoshop stack, as he describes at http://www.tawbaware.com/forum2/viewtopic.php?t=759 .

There are two main reasons why this example is more challenging than the first two:
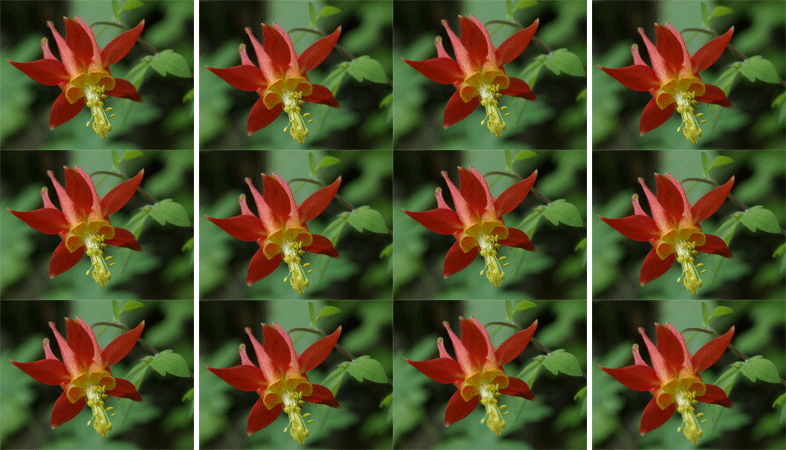
  1. Animation of columbine flower before/after registeringThe seven source images for this montage cannot be registered as perfectly as in our first two examples.  Due to natural movement of the flower stem, the flower rotates slightly between shots and also shifts across the background.  Here are all seven frames, before and after registration, animated as a film loop.
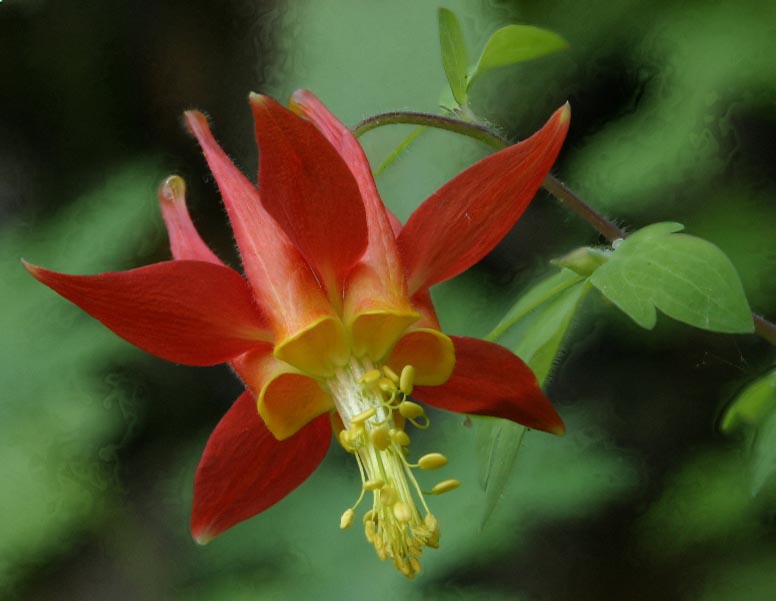
     
  2. Much of the image is background, which is not well focused in any frame.  Thus, in much of the image, an algorithm has essentially no information conveniently available to tell it which frame to select.
To attack this problem, I created a PTGui project containing the original 7 full-size images.  I defined control points and optimized pitch/roll/yaw/fov to register visible details in the flower and its leaves as well as possible between frames.  Then, based on visual inspection of the images, I decided to place the backmost image at the top of the Photoshop stack, because I anticipated having to do the most painting in that mask.  To accomplish that, I re-ordered the source images in the PTGui project to be in front-to-back order.  (This is because pano12.dll constructs the Photoshop stack from bottom to top.)  Then I rendered, using PTGui's "show script" option to insert the "z" line into the PTStitcher script.

Quite frankly, I was surprised at how well the current simple algorithm handled this problem.  Coming straight out of the algorithm, the flower looked pretty good.  The background, as expected, was sort of randomly selected from various images based on noise in the original images.  However, that aspect was easily cleaned up by painting white in the background image's mask -- the top one in the Photoshop stack.

To facilitate comparison with other available software, I then backed up and tweaked the PTGui project to produce a set of registered images at a convenient test/demo resolution that I could use as a standard input set for all software to be compared.  Then I ran the test/demo size registered images through four different extended depth-of-field packages:
  1. This experimental pano12.dll
  2. CombineZ (http://www.hadleyweb.pwp.blueyonder.co.uk/CZ4Docs/pages/introduction.htm)
  3. Syncroscopy Auto_Montage Essentials version 5.01.0006 ES DEMO (http://www.syncroscopy.com/syncroscopy/am.asp)
  4. Helicon Focus 2.03 Lite (http://helicon.com.ua)
These test images and outputs can be downloaded here: ColumbineDemoProject.zip (3MB).

Following is a summary of the results.  (You can click on any of these images to see them full-size in new browser windows.)

This experimental pano12.dll (raw output, no editing)

Raw extended depth-of-field columbine flower
Mottled background, some softness in the image, particularly in the transition between backmost  two images.


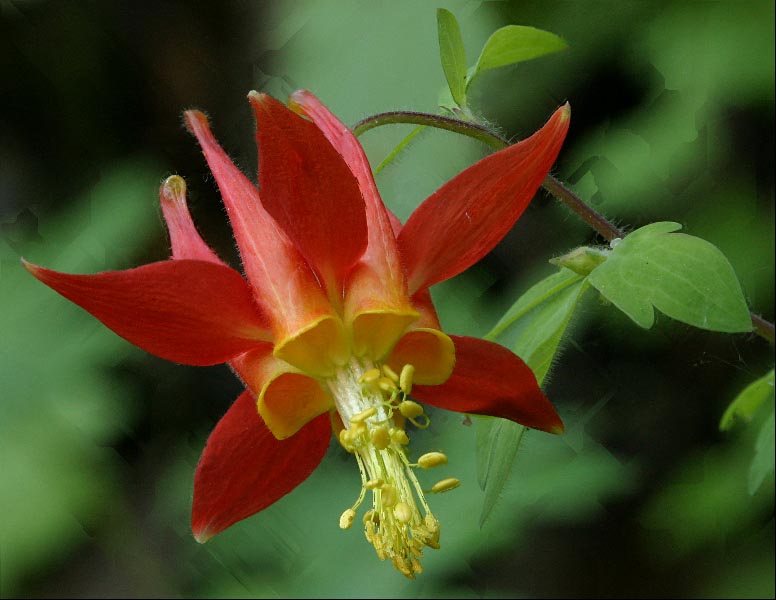
CombineZ, using default parameters and the single command Special | Do Combine.
CombineZ columbine flower
Hard edged streaky artifacts in background, doubled edges along some petals and throughout the yellow stamens.

I don't know how to adjust the parameters on CombineZ to make this better.  Suggestions, anyone?

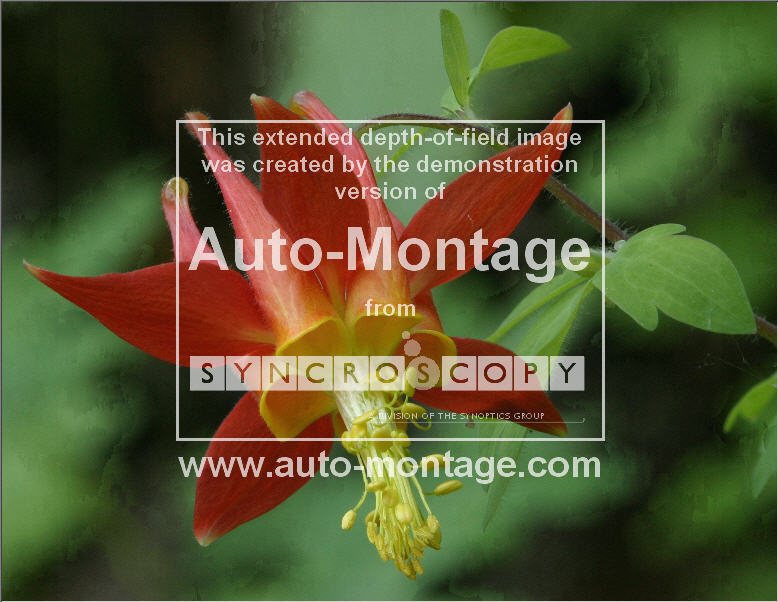
Syncroscopy Auto_Montage Essentials version 5.01.0006 ES DEMO (Scan Montage, Method: Fixed, Patch Size: 10).

Auto_Montage Essentials columbine flower
Mottled background, otherwise quite good -- crisp rendering and correct selection of source images..


Helicon Focus 2.03 Lite contrast estimation radius 10, smoothing 4, background dim-out 0.
Helicon Focus columbine flower
Extremely good automated result.  With these parameters, image suffers only from a slight smoothness, visible for example in the stem hairs.  With smoothing=0 (not shown), image details are crisp but background goes mottled.


This experimental pano12.dll, after editing just the topmost Photoshop mask.
Edited extended depth-of-field columbine flower
Smooth background (due to mask editing), some softness in areas that fall "between" two images. 

What I see here is a spectrum of capabilities and costs, with no single perfect solution.  Aside from the slight smoothness, the Helicon Focus image is extraordinary.  However, this tool has no image registration or image editing capabilities of its own.  Syncroscopy Auto-Montage has both, but it is rather expensive and the editing function is sluggish for large images.  CombineZ is extremely easy to use -- four mouseclicks to align and combine all the images -- but for this example, its output image is significantly lower quality than the others.  The experimental pano12 is still a bit clunky, but its output image and editable format has some attraction if you are going for highest quality.  And of course, it's free.

Your mileage may vary.  I am not expert with any of these codes, including my own.  Suggestions for improvement will be appreciated.

June Beetle Example

This is a more recent example, designed to see how this Panorama Tools technology behaves when pushed. 

The June Beetle was imaged using a Canon Digital Rebel camera with a Sigma 100 mm macro lens at 1:1, f/11.  55 input frames were captured at size 3072x2048 pixels,  stepping the subject-to-lens distance by 0.010 inches in depth to guarantee that every point was well focused in some image.  (This increment was smaller than necessary.  Stepping by 0.030  inches would have yielded almost the same quality.)  These 55 input frames were entered into a PTGui project (version 3.7beta1, from http://www.ptgui.com).  Control points were generated automatically using autopano_v103 (http://www.le-geo.com/kolor/autopano/), invoked from PTGui.  A couple of iterations were performed, using PTGui optimization for fov/pitch/yaw/roll and the APClean utility (http://www.fsoft.it/panorama/APClean.htm) to remove out-of-concensus control points, eventually leaving in place 3042 control points with an rms error of 0.06% of image width (1.95 pixels out of 3072).

An extended-depth-of-field output image was rendered direct to JPEG using "z s7 f7" at 3072x2048 pixels. 

This output required light editing to clean up the background and to improve upon the automatic determination of best focus within the foreground antenna.  To enable this editing, a second rendering run was done, identical to the first except that the output image format was changed to "Multi-image TIFF".  This rendering run generated 55 separate output images, each properly registered against the single extended-depth-of-field image.  Then, using Photoshop CS, visually selected portions of a few of these separate images were manually merged into the extended-depth-of-field image.  This merging was done by repeatedly overlaying the extended-depth-of-field image with one of the separate images, adding a "hide all" layer mask, painting the layer mask white to use the selected image's pixels instead of the algorithm's output, then flattening the two layers into a single improved extended-depth-of-field image. (Unlike using Photoshop's "clone" tool, working with the mask image allows one to edit nondestructively until the two layers are flattened.) 

In this application, it would not have been effective to have Panorama Tools generate a .psd file including masks, because the large image size and large number of input images would have produced an unmanageably large .psd file.  It was much more practical to let Panorama Tools generate a single flattened extended-depth-of-field image, then do the minor editing one image at a time.

Alternate Workflows

For comparison purposes, I also tried running the June Beetle example through Helicon Focus to compute the extended-depth-of-field image from the registered "Multi-image TIFF" files generated by Panorama Tools.  As with the Columbine flower example discussed above, the Helicon Focus output was very good other than some overall softness that I could not eliminate without introducing visibility defects.  It seems again that the tradeoff is between highest final quality and ease of use.  For routine use, an attractive workflow is to use Panorama Tools to generate properly registered intermediate images, and feed those to Helicon Focus for extended-depth-of-field assembly.

However, quality of output can be further improved by combining the extended depth-of-field outputs of Panorama Tools and Helicon Focus.  To use this workflow, run Panorama Tools once to generate an extended depth-of-field image, and a second time to generate registered intermediate images which get run through Helicon Focus.  Then load both extended depth-of-field images into Photoshop as two layers with masking, and manually paint the mask to reveal the best parts of both images.  In my testing, it seems typical that Panorama Tools generates a sharper image over most of the area, while Helicon Focus does a better job around the edges of objects.  (Note: it's probably best not to use the free version of Helicon Focus with this method, since then their required message gets more than a bit misleading.)

Known Bugs & Limitations

1. This version does not work if the red channel is saturated.  [At present, the pano12.dll code uses only the red channel for determining focus.  If the red channel saturates, then the code will think that the image has no contrast at that position and will make correspondingly bad decisions about focus, even though the green and blue channels contain perfectly good data.  This limitation is only because I had to hack the algorithm into pano12.dll (since PTStitcher source code is not available), and at the best place that I could find to tap in, the only available image data is the red channel.]

2. This version correctly handles only those areas of the picture that are covered by all images.  If any image does not cover some area of the picture, then incorrect masks are likely to be computed in that area, particularly if blended masks option m2 (default) is used.  It is not immediately clear how to remove this restriction, due to difficulty defining a smoothing algorithm that is both correct and useful even around image edges.

3. No support for 16-bit images -- will not work properly and will not diagnose the problem.

4. The recommended settings for fN and sN are preliminary and have been developed with small images (<1Kx1K) from a digital SLR.  For larger and/or noisier images, larger window sizes will be required.  Processing large images with large windows can be time consuming -- the columbine image at 3K x 2K and f19 s19 took close to an hour at 2.8 GHz.  The computation time for the current implementation scales as the square of image size times the square of window size.  (The surrounding window contents are evaluated for each pixel from scratch.  There are standard ways to speed this up a lot by incremental updates, if there is sufficient demand.)

5. No support for smoothed masks except with m2 (stacked blended masks).  For example there is no concept of exclusive masks with soft edges, equivalent to painting masks in Photoshop with a soft-edged brush.

6. Does not work if the Panorama Tools options for color and/or brightness correction are selected.  Be sure to disable these corrections in your GUI.  If you need these corrections, make them in a separate step to generate new image files, then use the corrected files as input to the extended depth-of-field code.

7. The current version of autopano (v103) sometimes generates incorrect control points for images that contain out-of-focus regions.  This problem is being investigated.

Contact Info

I would like to hear feedback about this work.  Please let me know of any successes, failures, problems, or other comments.  Here is current information on how to reach me.

Rik Littlefield

Page last modified November 25, 2009.  Page modification April 20, 2005.  Previous major revision October 23, 2004.